BMW E46 M3 Rear Wheel Arches Rusting
Key Points:
- A real solution to the common E46 rear wheel arch corrosion and rust problem.
- Tackling the root cause of the problem head on.
- Improves tyre-to-arch clearance to limit the risk of bodywork scrubbing.
- 'U'-shape channel removed so no where for dirt/debris/mud/grime/water to collect.
- Usually able to carry out the repair without affecting outer arch body-coloured paint.
- Vehicle off the road for usually less than one week.
- 15y experience with E46 rust problems and a proven track record of solutions that work.
All E46 Rear Arch corrosion starts from the Inner Arch area.
Regardless if you can only see a small blister on the Outside Arch area.
We can guarantee you that the epicentre is hidden under Seam Sealer on the Inner Arch area.
This means if you aren't tackling the Inner Arch area then the corrosion will return.
History:
We've been tackling E46 Rear Arch corrosion for many years now and if you've followed us on our YouTube channel, and Facebook/Instagram pages you would have seen several of our repairs
When we started doing the E46 Rear Arch repairs back in 2015 the Genuine BMW Inner Wheel Arch Panels were affordably priced at around £300 per side.
In 2024 the BMW panels went No Longer Available.
Then in 2025 they came back as available again BUT due to starting a new batch of pressings BMW upped the price to a whopping £990 EACH PANEL!
This means you would spend £1980 before even driving your vehicle into the workshop.
Problem:
E46's have a 'U' shaped channel on the inside of the rear wheel arches.
This is where two panels meet: The Inner Arch and The Outer Arch.
They were designed like this for 'speed of production' at the factory so the robots had something to spot weld and therefore join the two panels but keep the join hidden.
Being a 'U' shape channel means it collects all sorts of dirt/debris/mud/grime over the years which also gets wet if you have ever driven in the rain.
(Even dry-driven cars stored outside get damp due to the condensation effect).
If the E46 was still 5 years old we could all agree that regular cleaning of the 'U' shaped channel would be enough, however, our E46's are now 20-25 years old and unfortunately the damage has already been done.
Misconception:
Most people start noticing paint blisters and bubbles on the outside of the rear wheel arch causing the paint to raise and lift.
Eventually the corrosion growing underneath the paint expands to a point where the paint can no longer flex and therefore cracks and then the orange/brown corrosion and rust coloured metal beneath is exposed.
It's often assumed this corrosion is localised and having just the outer wheel arch rust ground back or even cut out then filled and painted is sufficient.
Unfortunately, that's just treating the effect and not the actual cause.
As the corrosion usually comes back within 6-12 months.
Think of it like putting a sticky-plaster on a broken limb.
ALL corrosion on E46 rear arches starts from the inner arch, not the outer arch.
Therefore, the only way to truly remove this corrosion is go deeper and remove the inner arch - just like how the M3 CSL arches were constructed at the factory.
Solution:
Having been carrying out E46 Wheel Arch rust repairs for over a decade, (as well as dealing with general E46 corrosion for 15 years) we've trialled many options for this subject.
In fact, we've identified 8 versions of E46 Rear Wheel Arch needs depending on how corroded your vehicle is.
It's almost impossible to price them all individually as corrosion takes hold in such a unique way and each vehicle can be suffering quite differently.
However, a process that works really well, and caters for lots of typical E46 Inner Arch Corrosion is what we know internally as 'Option 2'.
The beauty about our process is that not only do we create a similar finish to the E46 CSL style rear arch, but remove the corrosion properly, and improve the tyre clearance to the rear arch.
Most E46 rear arches are approx 15mm thick.
The CSL rear arches are approx 4mm thick.
Our CSL-style arches are approx 8mm thick.
This means you have approx 7mm more clearance between your tyre and bodywork.
This can help if you are using Wheel Spacers which are contacting the wheel arch, or if you plan to lower your suspension further, or maybe upgrade to some wider wheels or lower ET offset wheels.
It could even save you adding excessive negative camber just to reduce tyre rubbing.
This also means the inner arch is converted to a near vertical finish and therefore water/salt/mud cannot collect and instead simply slide down the newly created vertical angle and fall onto the ground.
Here are a series of pictures showing our process:
1. Arches cleaned out and cleared of dirt to expose the corroded section of the Inner Arch: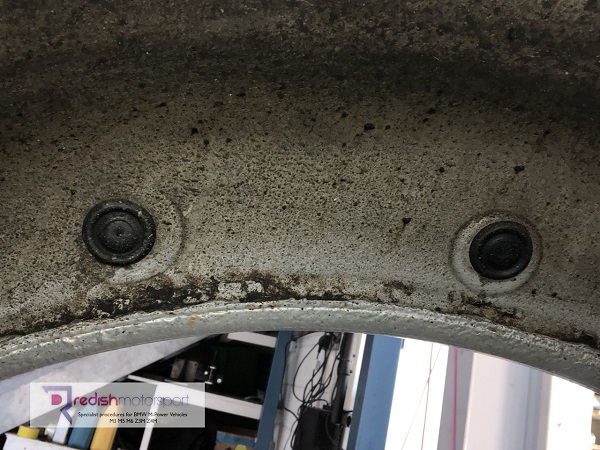
2. Corrosion and a hole exposed now that some sealer has been initially removed: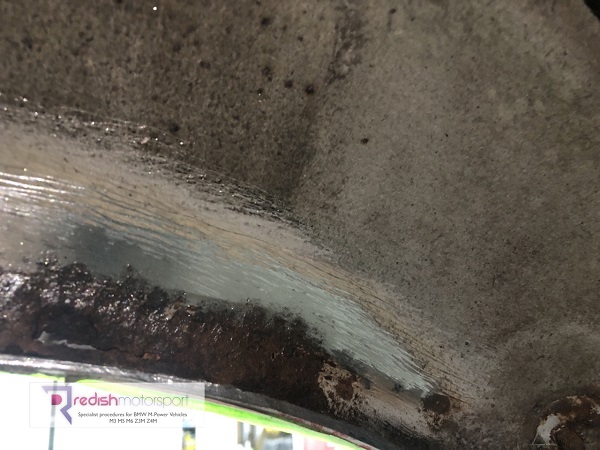
3. Some bright metal remains but mostly corrosion, pitting, and rust holes.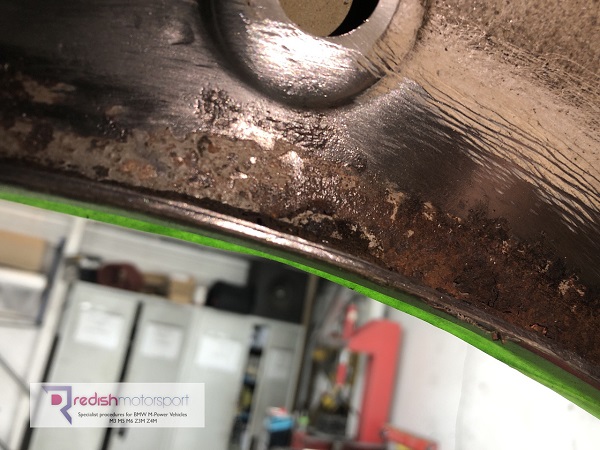
4. Marking and cutting out of the affected inner arch panel (similar to CSL style).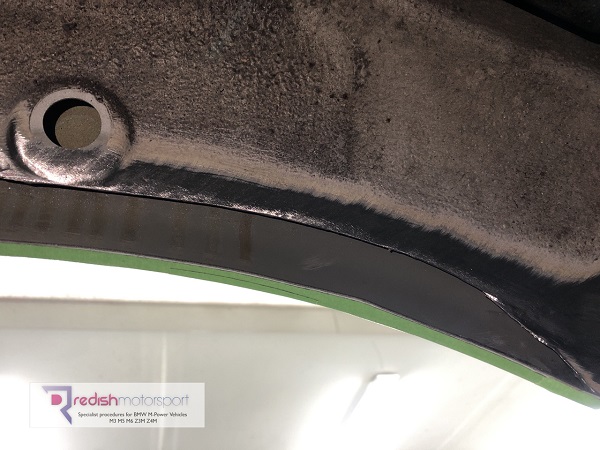
5. As long as the corrosion is under or up to the factory grommet holes this repairs works well.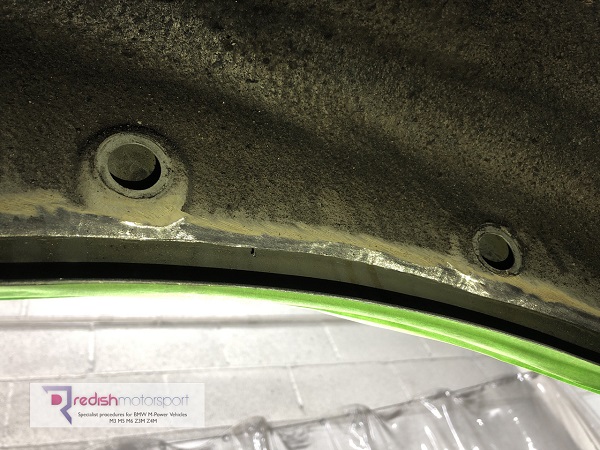
6. Affected inner arch piece cut out to show the corrosion and rust hole that was present.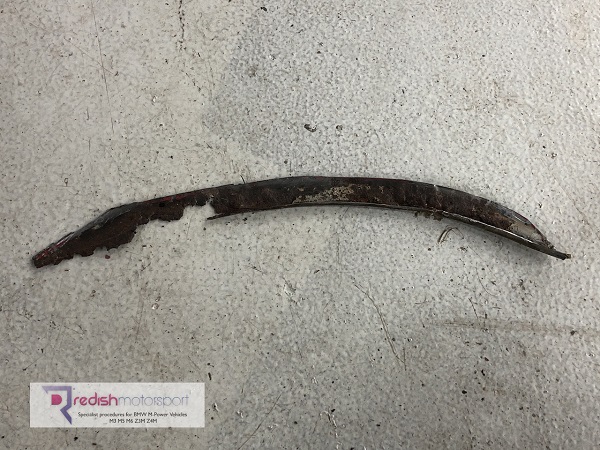
7. Same piece of inner arch but the 'rear side' showing not enough factory cavity wax.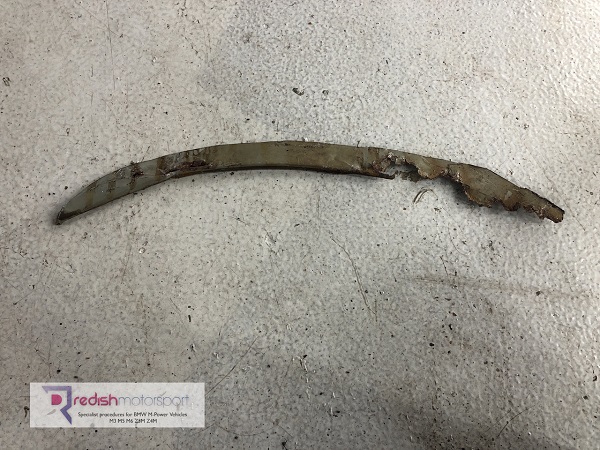
8. Arch cleaned, degreased, and mask protected ready for rust converter chemicals on metal.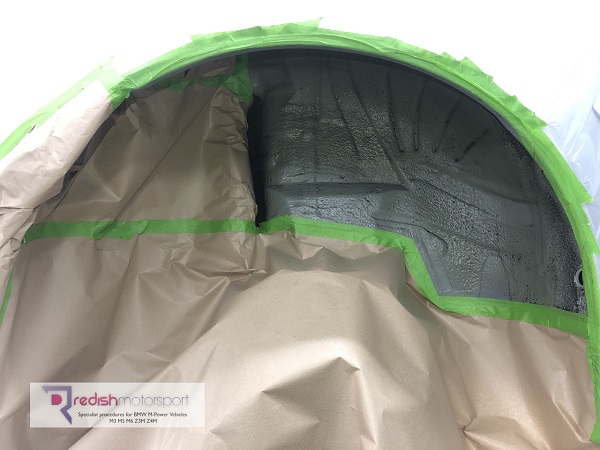
9. Multi-stage 2k hardened panel bond adhesive applied to mechanically bond the inner and outer arch panels together (how the factory created the CSL arch) without using spot welding.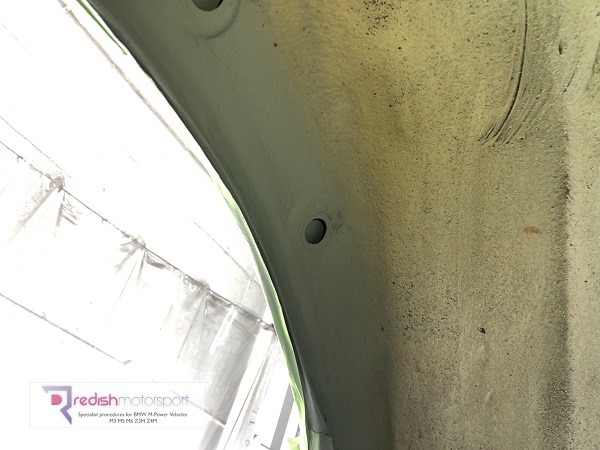
10. Primers & brushable sealers used then a sprayable textured seam sealer applied which is overcoated with BMW E-coat colouring and therefore finished as per our famous restorations.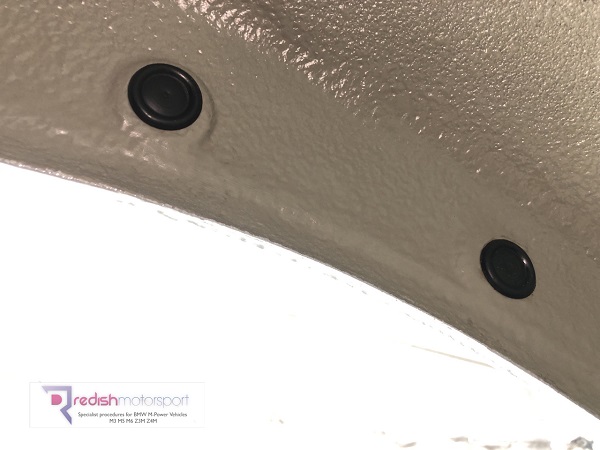
11. This OEM+ finish enough the inner & outer arches are no longer touching 'metal on metal'.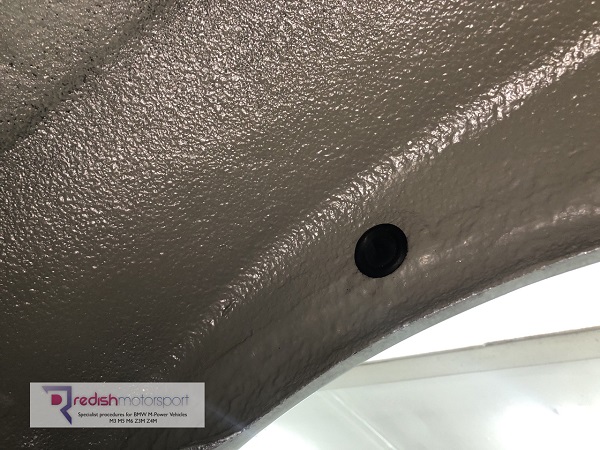
12. Once fully cured we inject cavity wax into the hidden sections and install the grommets.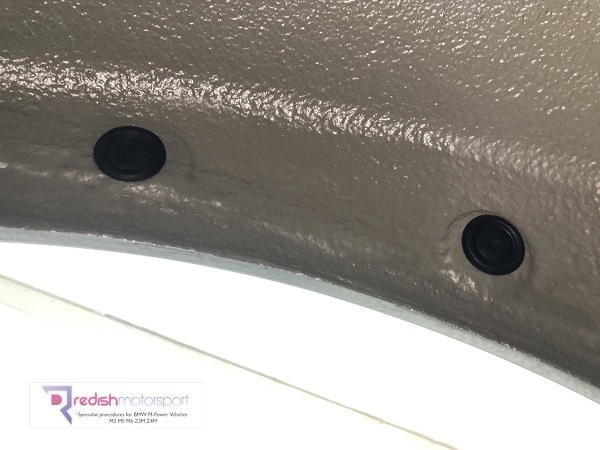
Concerns or apprehensions:
Most people are glad to be rid of the corrosion and appreciate the need for moving away from the 'spot welded' design of the rear arch panels.
However, we understand that some people may be concerned about the use of 'panel bond adhesives' used to join the 2 panels together.
Having studied the E46 CSL rear arches in great detail and on two separate occasions over the past 10 years been in the almost unique position to dissect the inner workings of a CSL wheel arch, we can use this knowledge to improve the E46 design whilst curing a inherent problem.
Let's remember that adhesives have come a long way in the past 30 years and are obviously regular place for the aero industry, but also hugely relied upon by automotive manufacturers when assembling body panels (which famously came on the Lotus Elise chassis in 1996).
In more modern years, manufacturers (including BMW) not only offer this cold-works-technology as a repair often but in fact now a days insist on replacement panels being bonded to the chassis rather than hot-works welding.
This is mainly to reduce labour time as well as danger from hot-works activities, but also to reduce the risk of corrosion from poorly protected internal cavities where the E-coat burns off during a welding process.
You can see BMW's approach and how much they stand by panel-bond-adhesives in a screenshot from a rear arch panel catalog showing the adhesive required: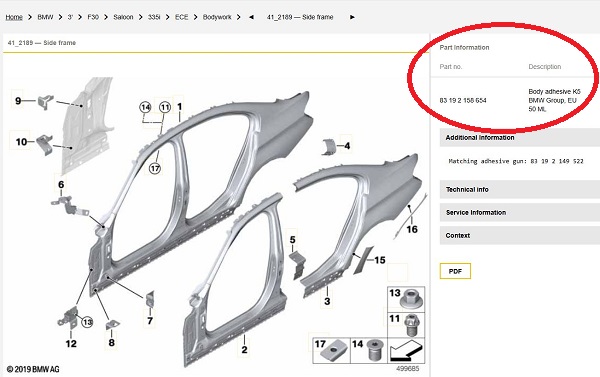
As well as a video example from one of the hundreds of BMW-approved bodyshops in the UK:
Conclusion:
At the end of the day, there will always be pros and cons for a multitude of retrospective repair procedures like this which enthusiastic-led specialists like us create.
However, after carrying out E46 rear arch work for 10 years, and the newer 'CSL-style' bonded approach for around 5 years, we're yet to be made aware of an issue returning.
Notes:
a. Our example pictures above are of a car which does NOT have outer arch corrosion.
If your E46 has outer arch corrosion then the paint on the outer arch (body-colour) will need removing back to bare metal to assess and address that outer arch panel too.
b. If your outer arch does need to be bare-metalled and in some cases even cut out and replaced, this will incur additional cost due to the extra time and parts required.
c. If you authorise any outer arch work to be completed you must be aware that you will immediately need to take your vehicle to a bodyshop for 'body-coloured' paint to be completed on the outer arches.
This is because we are unable to offer oven-cured outer body-coloured paint matching and therefore you will incur those additional costs at your chosen bodyshop.
d. If required, a true CSL arch (4mm) can be created on request but has higher costs due to additional time required as well as the 100% likelihood of you having to then have outer arch body-coloured paint separately at your bodyshop due to the need to use hammer & dolly tools.
e. If we do find additional corrosion concerns in/around your arch or adjoining sill / wing panels we will inform you.
That's why we say we need your vehicle for a minimum of one week, but if you have additional corrosion locations and problems which need addressing (at additional costs) we would then likely require your vehicle longer due to the extra work required as well as parts/panel availability.
f. Each stage takes many hours to cure and fully harden (often overnight) and therefore adds up to many consecutive days being worked on.
This process cannot be rushed and corners cannot be cut therefore if you are looking for a quick or cheap fix then our repair wouldn't be recommended.
However, if you are seeking a solid repair and proven solution then please get in touch.
g. The video below gives a prime example of how sometimes both you as the owner and us as the repair can come across a surprise which neither party expected.
This sort of problem is more common than you think (i.e. finding a previous repair) and unfortunately adds delays and unexpected costs due to further work/parts required.
We do absolutely everything we can to limit any issues as nobody likes surprises, but sometimes in unforeseen circumstances things are outside of our control.
However, we're extremely transparent and love to keep you updated with pictures and even videos of our progress so we're positive that we can help your through your wheel arch issues.
Final thoughts:
Redish Motorsport were early adopters of E46 rear arch replacements way back in 2015 and just like the RACP Repair & Reinforcement Process are commonly recognised as near pioneers of this 'CSL-style' arch repair in the UK.
With years of experience on the E46 chassis, and especially chasing corrosion, we have utter confidence in opening up BMW body's to component metal form and have been able to produce adequate solutions to common problems.
If you have any questions or would like to make a booking, please call us on 01179 781189.
Alternatively, you can send wheel arch pictures to our WhatsApp number 07928 345724.
To make a booking for this work we require a £500 deposit to secure you space in the workshop diary.